Introduction
This documentation explains how to add and configure the Microsoft SharePoint widget in Suivi, to display the content of a SharePoint site/library directly in your views.
Prerequisites
- Be authenticated on the Microsoft tenant connected to Suivi
- Have the necessary permissions to read and/or write in the targeted SharePoint library
To use the SharePoint widget, you must be authenticated on the Microsoft tenant connected to Suivi and have the necessary permissions to read or write in the SharePoint library.
In Suivi, access to SharePoint is based on a Microsoft consent mechanism: an administrator authorizes the application to access the organization's SharePoint resources. Users then use their delegated permissions (their own Microsoft 365 rights): the widget only displays and allows actions on sites, libraries, and documents that the user already has access to in Microsoft.
Dashboard View
In all boards located in a tenant with a Microsoft SharePoint connector, and as soon as you have contributor rights on the board, you can add SharePoint widgets to a Dashboard view.
In the Dashboard view, click on Add a widget, then on Microsoft SharePoint.
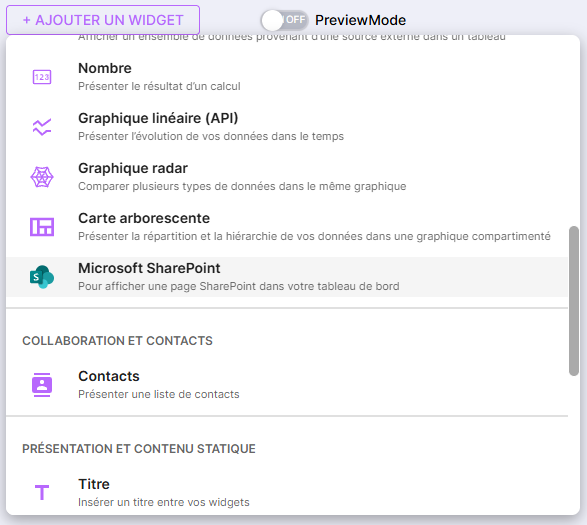
The widget appears in the view and prompts to be configured.
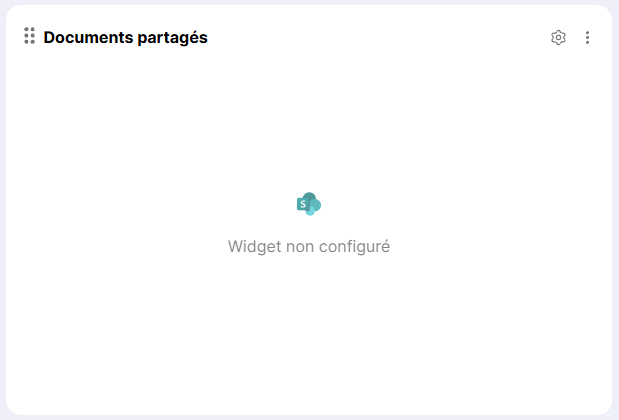
Click the gear icon in the top right of the widget.
The widget configuration menu opens in the right side panel.
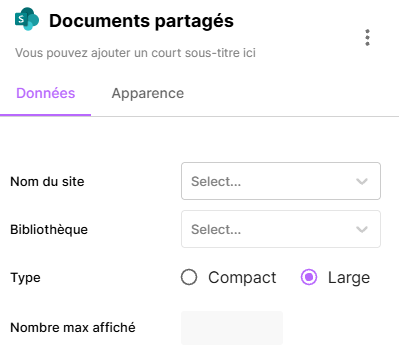
From this configuration menu, you can:
- Edit the widget title
- Edit the widget subtitle
- Select the name of the site containing your data
- Select the name of the library containing your data
- Select the folder level containing your data
- Choose the widget display type:
- Compact: displays only item thumbnails
- Large: displays items in list format
- Choose the maximum number of items displayed in the widget (default: all)
In the Appearance tab, you can define the list of attributes visible in the widget (in Wide mode).
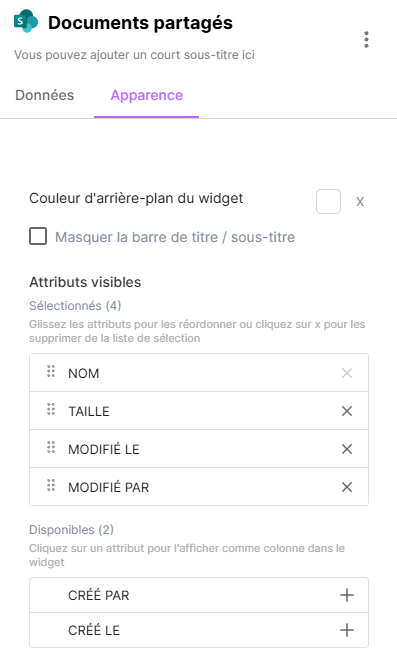
Once the information is completed, the widget displays the content of the configured directory.
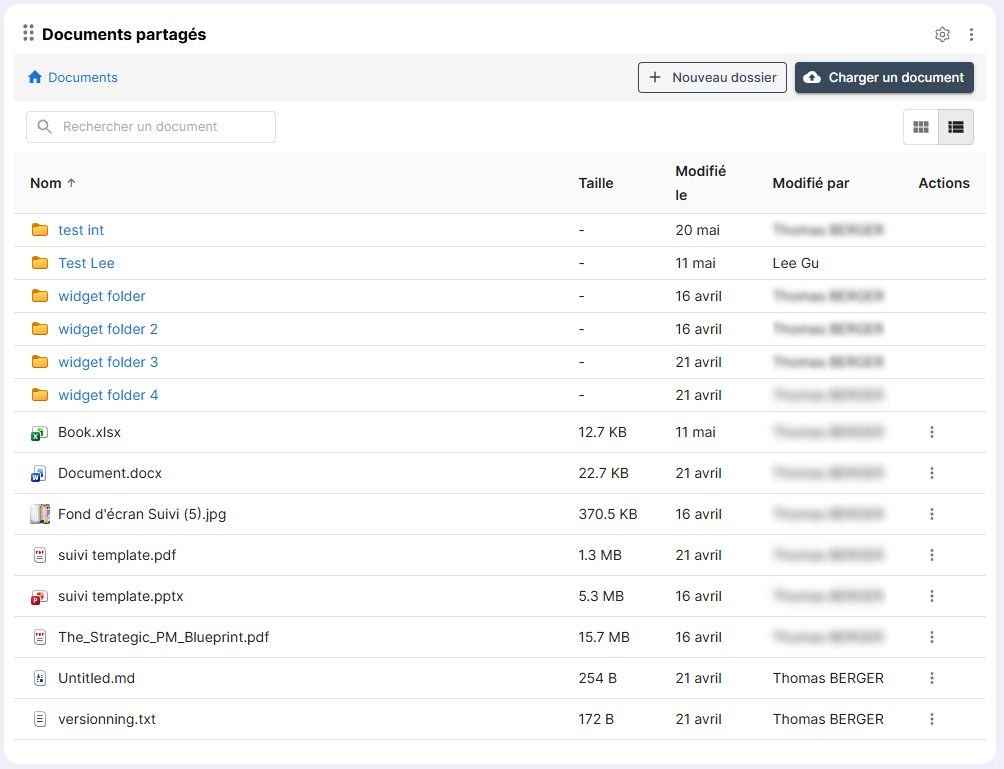
Through the widget, depending on the user's permissions on the Microsoft tenant, it is possible to:
- Upload a document
- Create a new folder
- Search for documents
- Read documents
- Open the document for editing (through Microsoft Online)
- Switch the display between compact mode and wide mode on the fly
- Sort by attribute
Portal
Home Page
In all portals located in a tenant with a Microsoft SharePoint connector, and as soon as you have contributor rights on the portal, you can add SharePoint widgets to the portal's home page.
On the home page, click Add a widget, then click Microsoft SharePoint.
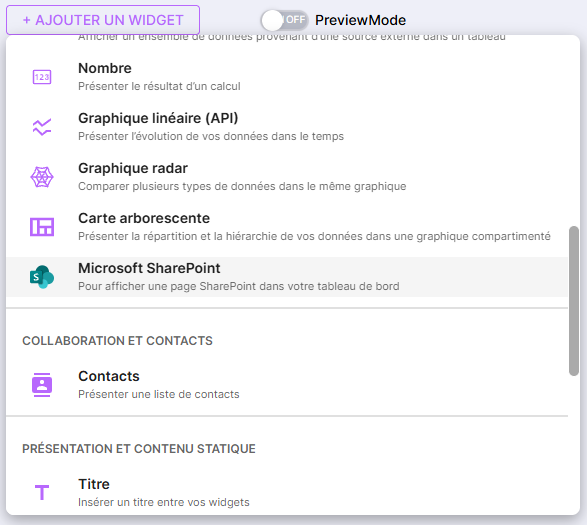
The widget appears on the home page and needs to be configured.
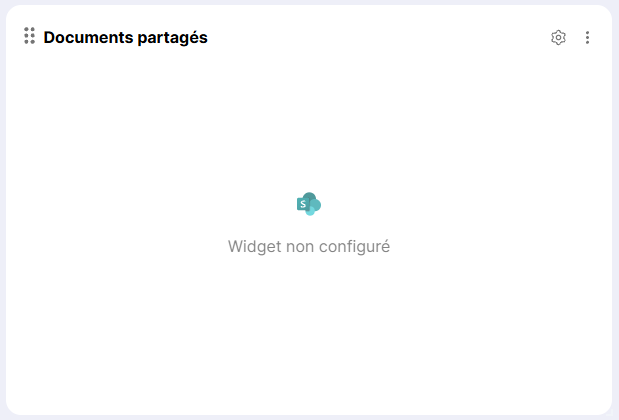
Click on the gear icon in the top right of the widget.
The widget configuration menu opens in the right side panel.
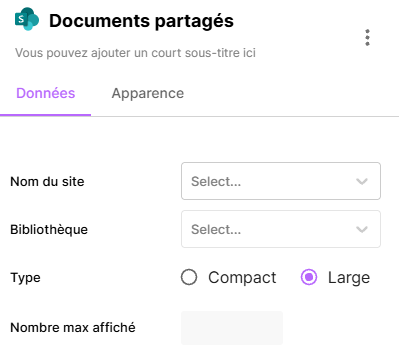
From this configuration menu, you can:
- Edit the widget title
- Edit the widget subtitle
- Select the name of the site containing your data
- Select the name of the library containing your data
- Select the folder level containing your data
- Choose the widget display type:
- Compact: displays only item thumbnails
- Large: displays items in list format
- Choose the maximum number of items displayed in the widget (default: all)
In the Appearance tab, you can define the list of attributes visible in the widget (in Large mode).
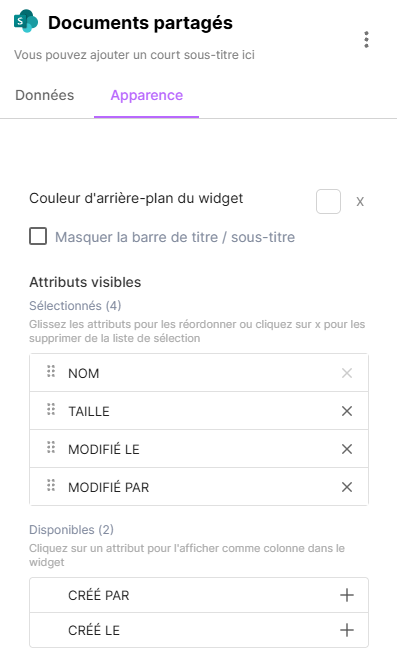
Once the information is completed, the widget displays the content of the configured directory.
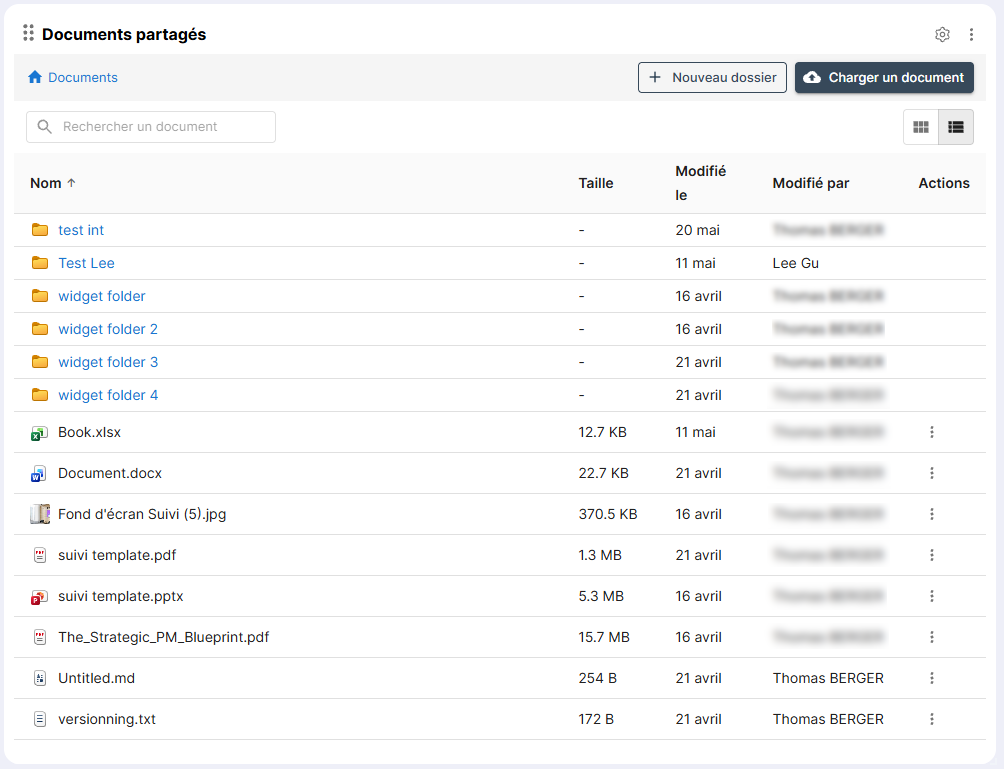
Through the widget, depending on the user's permissions on the Microsoft tenant, it is possible to:
- Upload a document
- Create a new folder
- Search for documents
- Read documents
- Open the document for editing (through Microsoft Online)
- Switch the display between compact mode and wide mode on the fly
- Sort by attribute
Favorites menu
The favorites menu only accepts the Compact mode for SharePoint widgets. Adding and configuring a SharePoint widget in a portal's favorites menu is similar to doing so on a portal's home page.
In the portal's favorites menu, click Add a widget, then click Microsoft SharePoint.
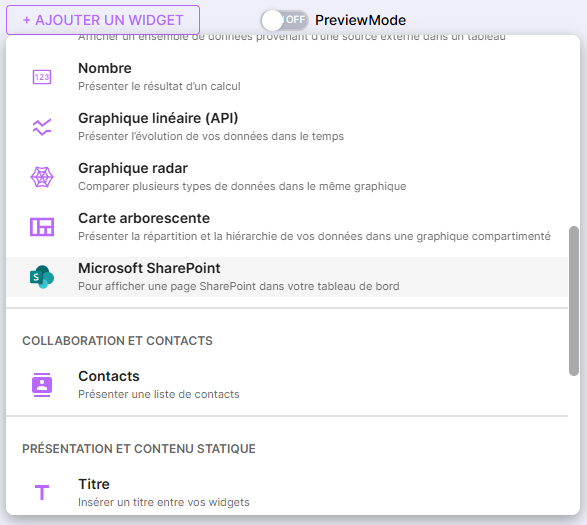
The widget appears and prompts for configuration.
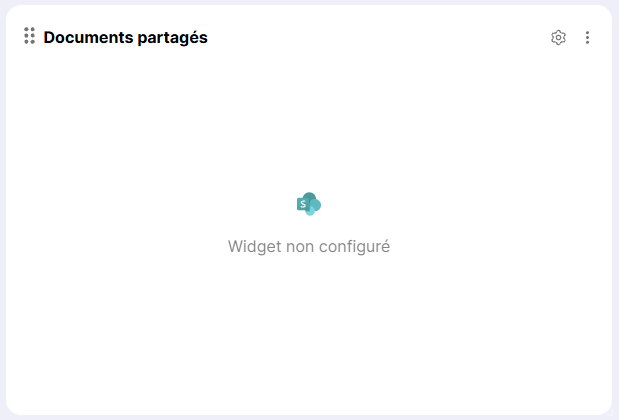
Click on the gear icon in the top right of the widget.
The widget configuration menu opens in the right side panel.
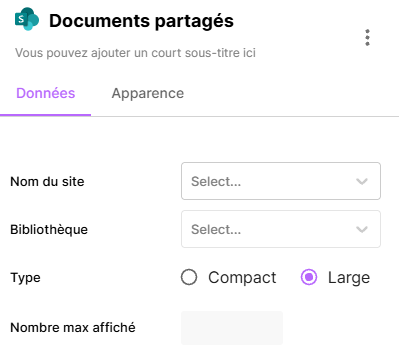
From this configuration menu, you can:
- Edit the widget title
- Edit the widget subtitle
- Select the name of the site containing your data
- Select the name of the library containing your data
- Select the tree level containing your data
- Choose the widget display type:
- Compact: displays only item thumbnails
- Choose the maximum number of items displayed in the widget (default: all)
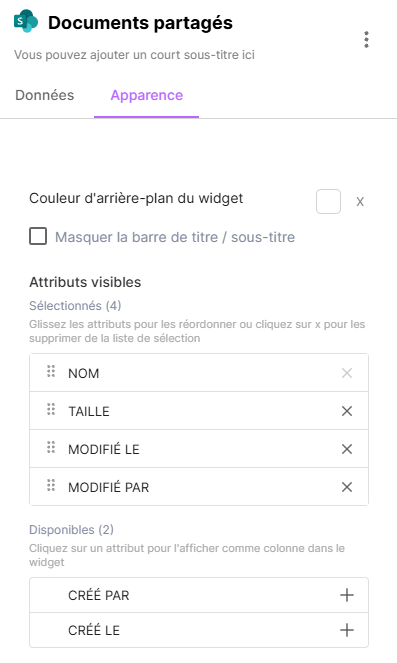
In the Appearance tab, you can define the list of attributes visible in the widget (in Wide mode).
Once the information is completed, the widget displays the content of the configured directory.
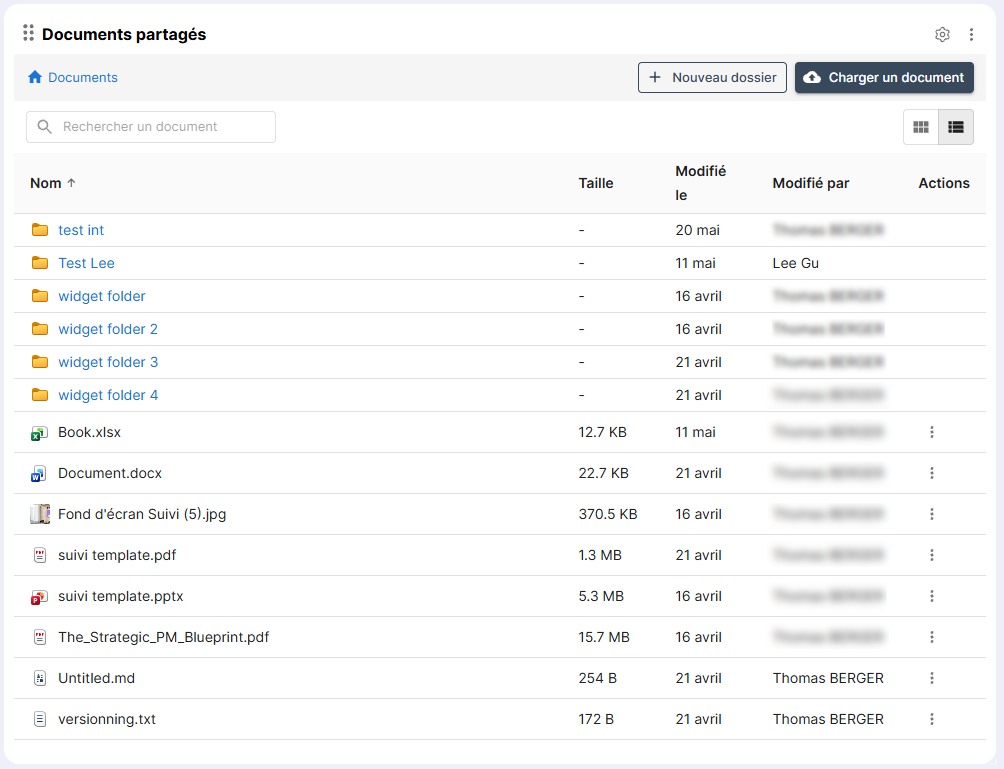
Through the widget, depending on the user's permissions on the Microsoft tenant, it is possible to:
- Upload a document
- Create a new folder
- Search for documents
- Read documents
- Open the document for editing (through Microsoft Online)
- Switch the display between compact mode and wide mode on the fly
- Sort by attribute