This section covers retrieving the board sample, designing the template, configuring attribute codes, and validating/publishing your template.
Step 1: Retrieve the board sample
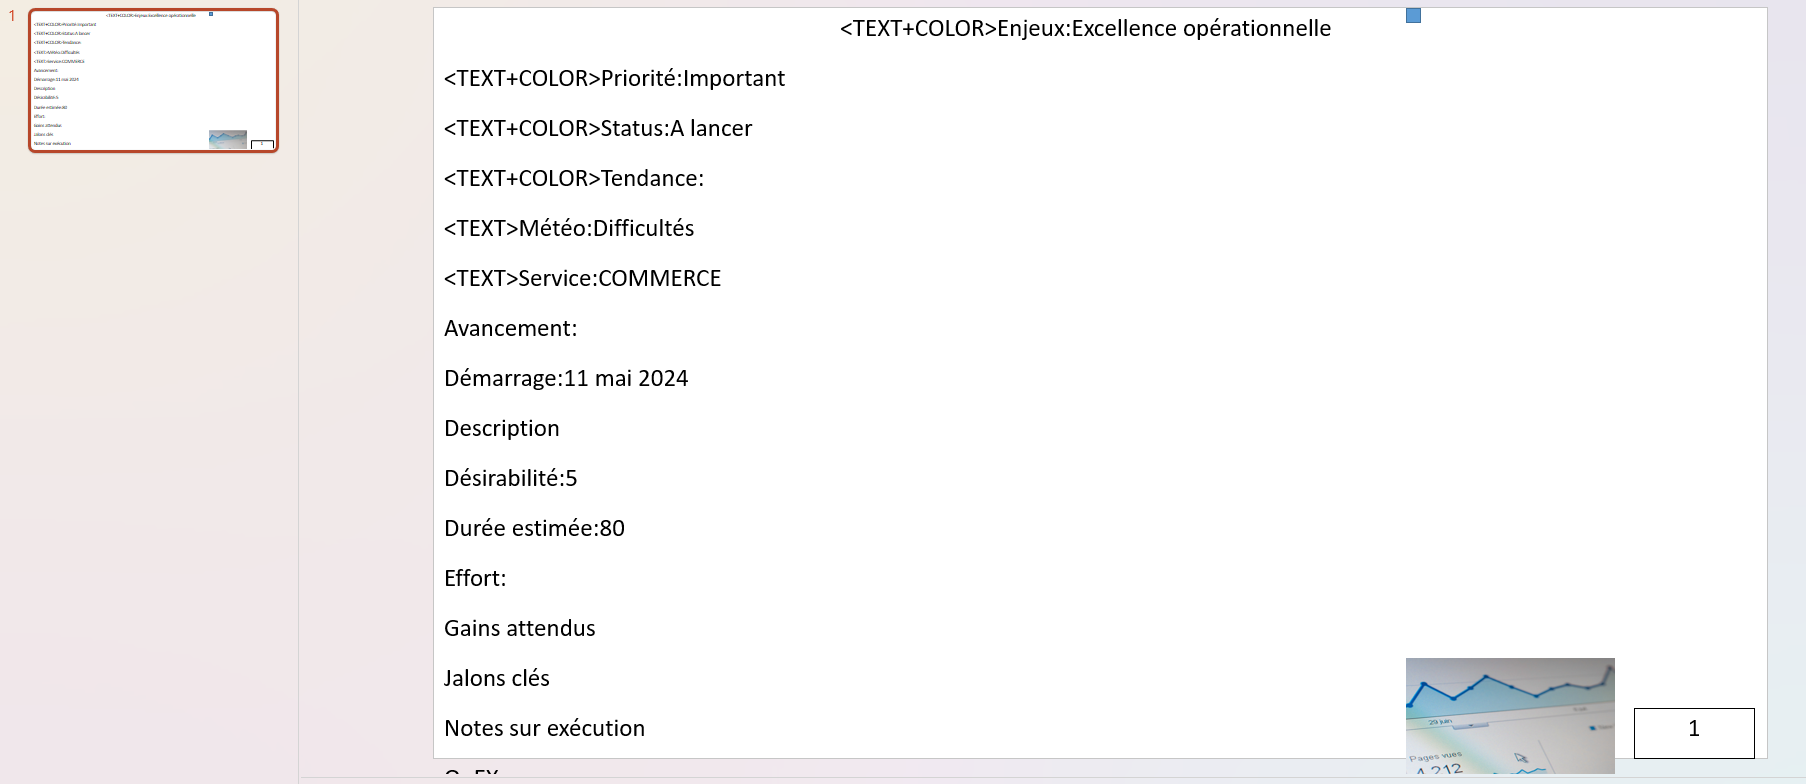
The sample is a PowerPoint automatically generated by Suivi. It shows all available attributes with real data from the first item in your board. It's your reference.
How to retrieve the sample
- Open your board in Suivi
- Click on Open board menu (button
…) next to the board name
- Select Manage PowerPoint Templates
- Click Add New
- Click Generate Sample
- The file is automatically downloaded to your Downloads folder
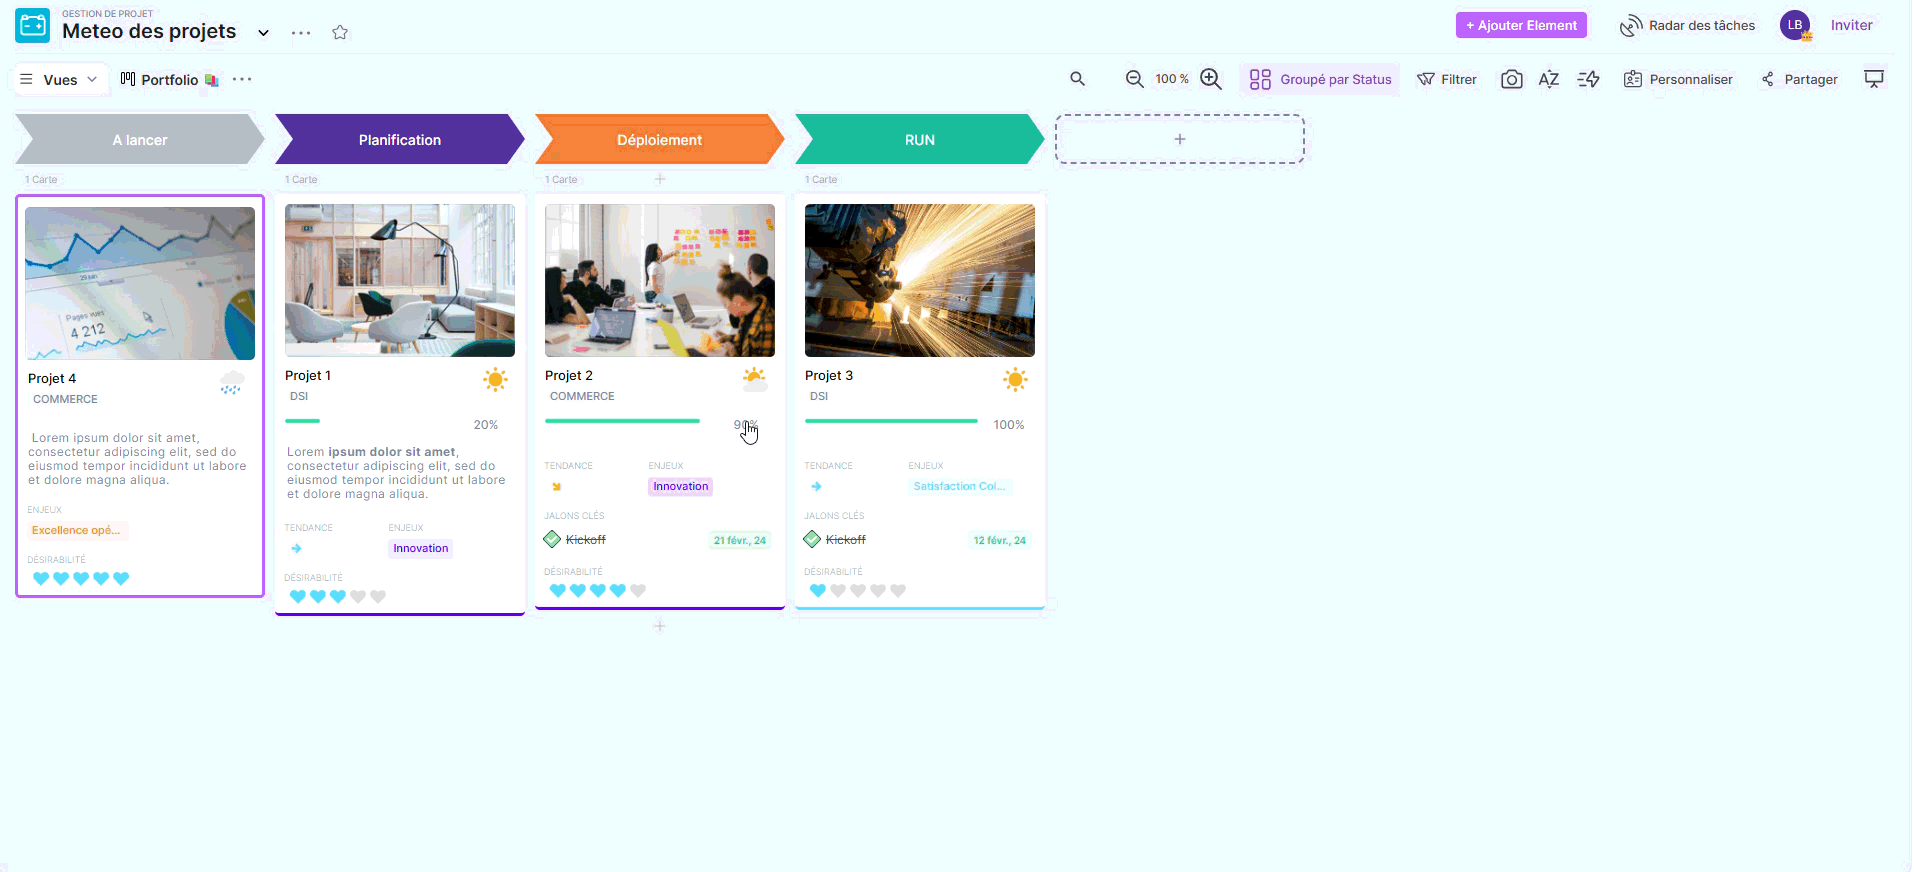
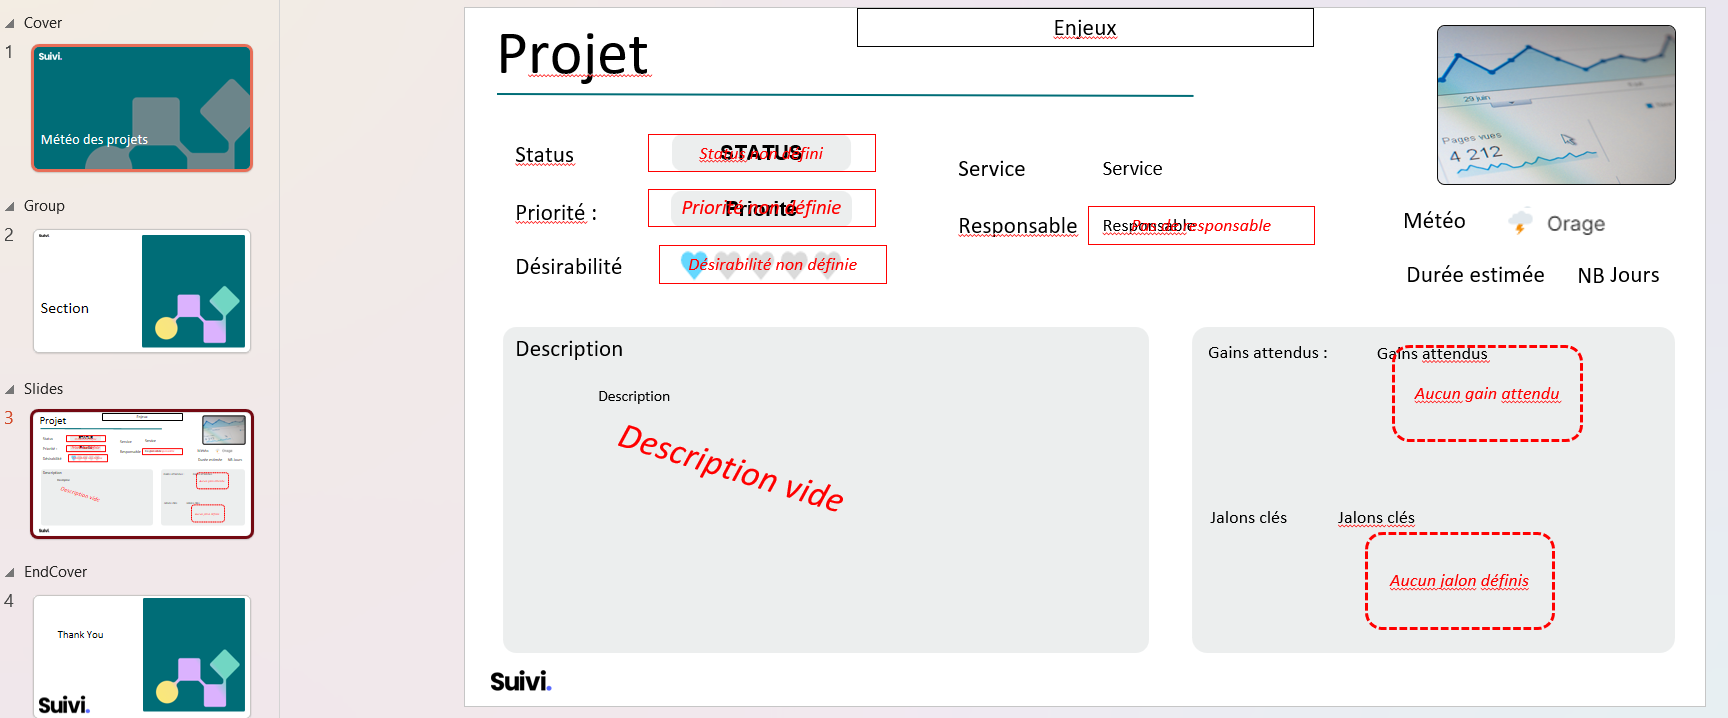
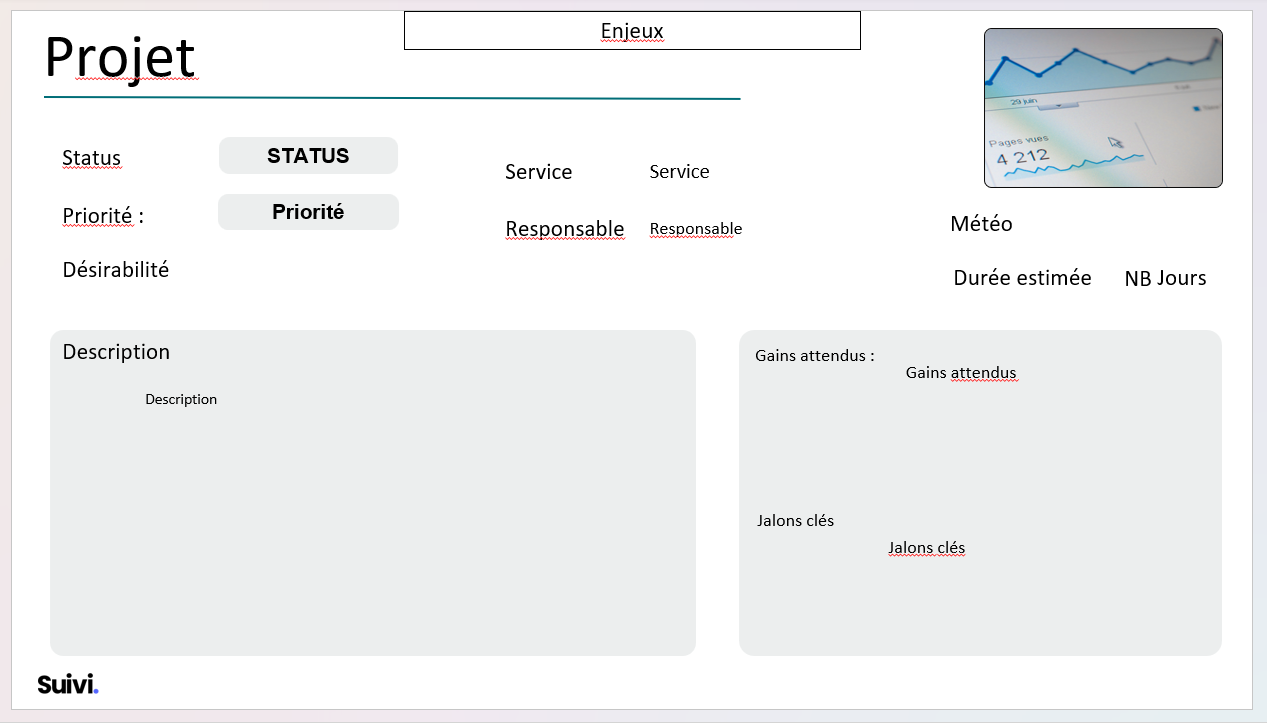
If you open the downloaded PowerPoint file, you will see:
- A single slide with all blocks in bulk
- Each block contains: a real value from the first item in the board
- Cryptic names in the blocks: these are the attribute codes
Step 2: Design Your Presentation Template
This is the creative step! You create the final presentation as you want it.
Create the Template Structure (Optional)
To have a presentation structure, it is possible to add a cover page and sections for each row grouping.
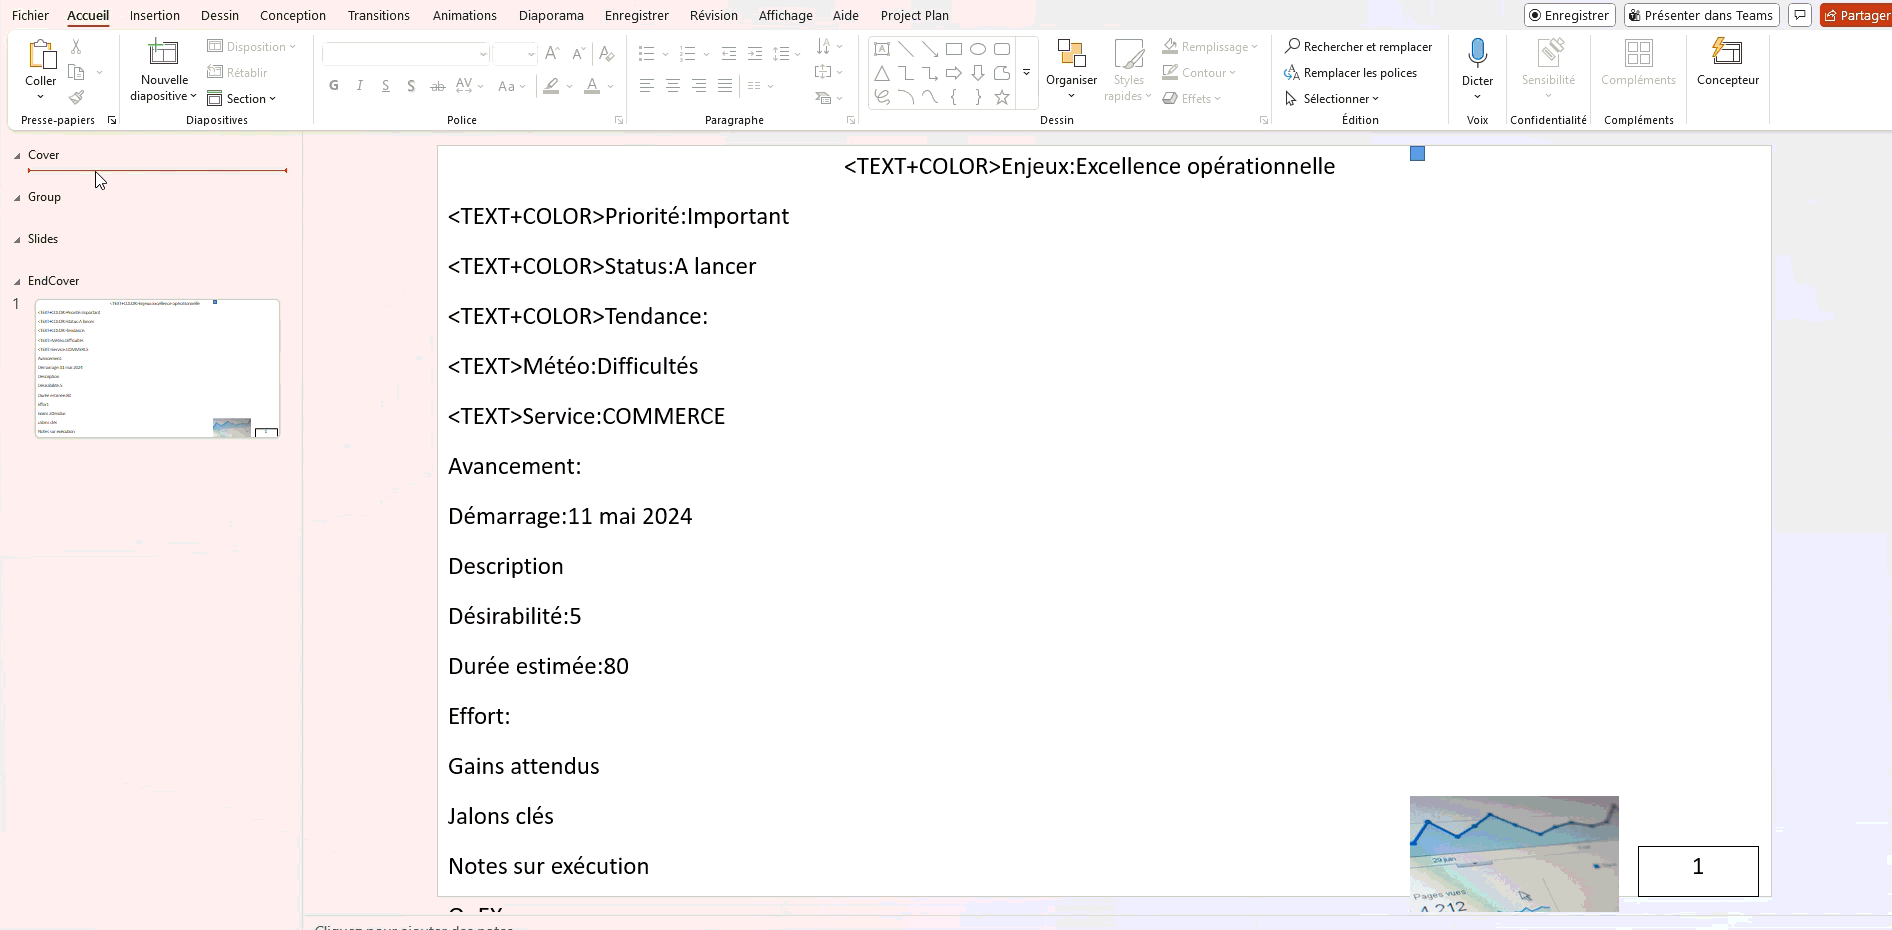
- Add the following sections to the previously retrieved presentation:
- Cover
- Group
- Slides
- EndCover
- Add a slide (empty initially) for each section
Customize the slides
Add to the slides your own design:
- Colors
- Fonts
- Background images
- Shapes
- Layout
Cover Section (optional)
Cover page of your presentation, may contain the title or general introduction.
Section Group (optional)
Section page, one per group of elements.
Section Slides
Page for each row of the view, it will be repeated for each element and contains the specific data for each one.
Design Tips
Imagine this slide for one element. For example, if it's a "Project" slide:
- Where to place the project name?
- Where to display the budget?
- Where to put the status?
Create text blocks for each of these positions, but leave them empty for now
Recommendations
- 📐 Keep a layout that is readable and not cluttered
- 🎨 Use a style consistent with your brand/organization
- 📝 Leave enough space for text to display completely
- 🖼️ If you want conditional images, prepare them now (see Advanced Features)
EndCover Section (optional)
Final page of your presentation, may contain the conclusion or contact information.
Step 3: Configure Attribute Codes
This is the step that connects your design to your data. You will copy the attribute codes from the sample to your slide.
Preparation
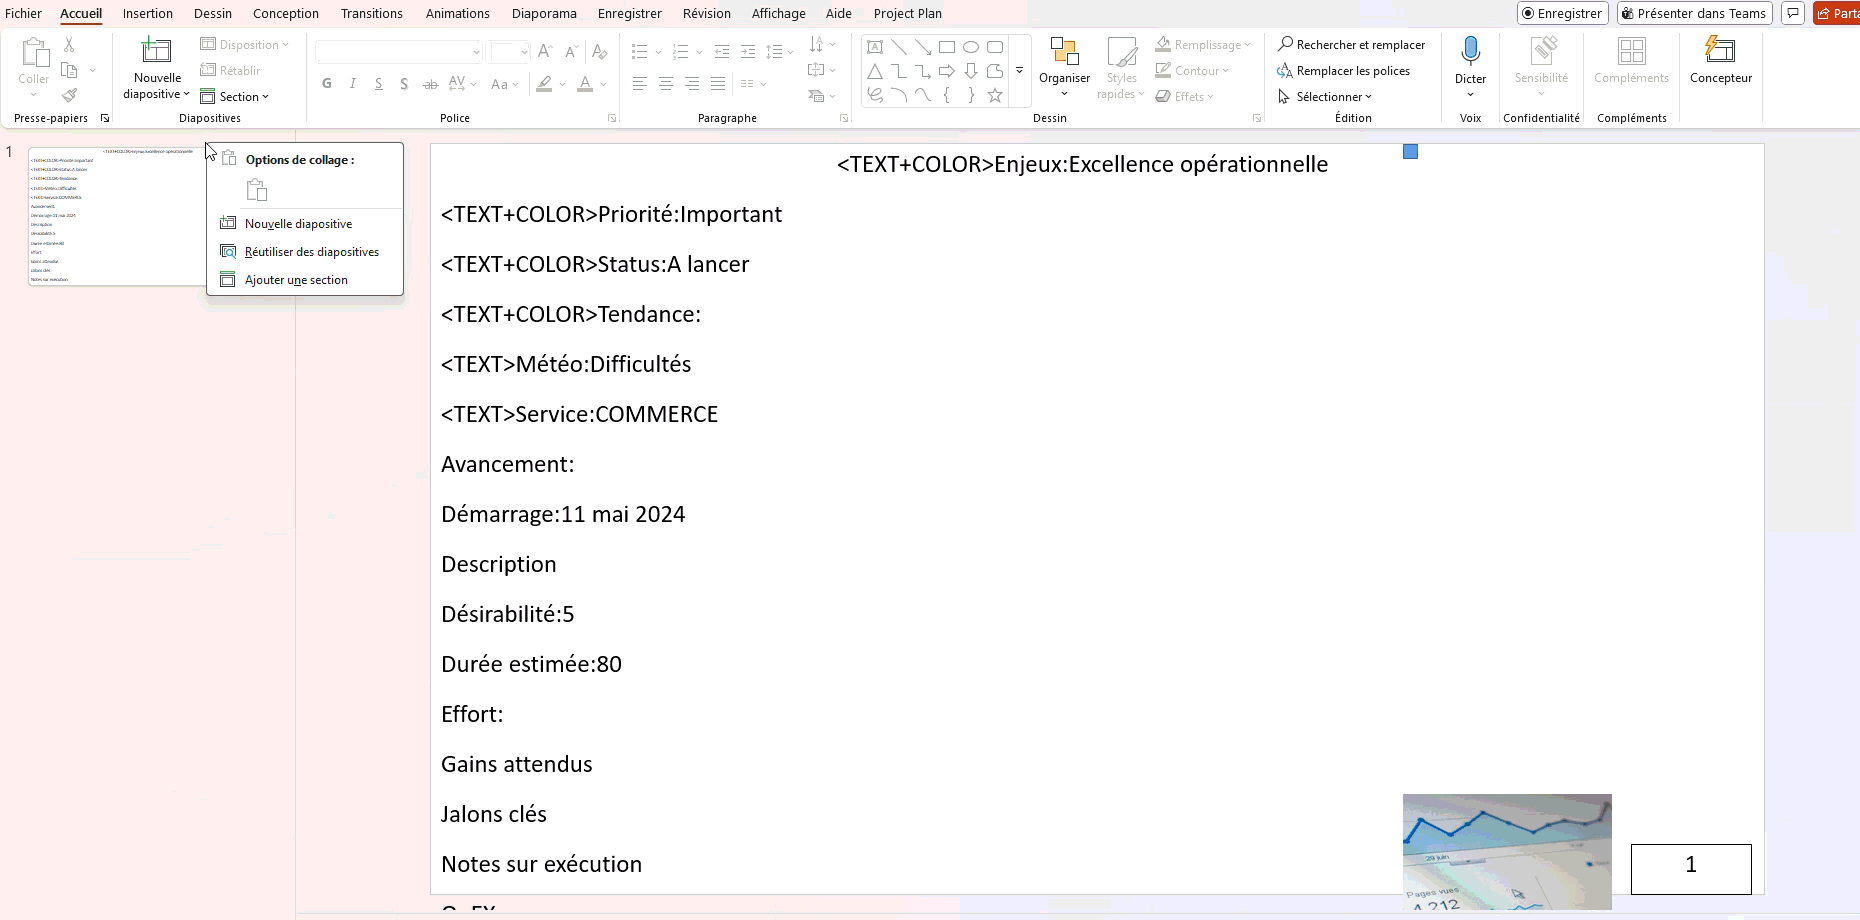
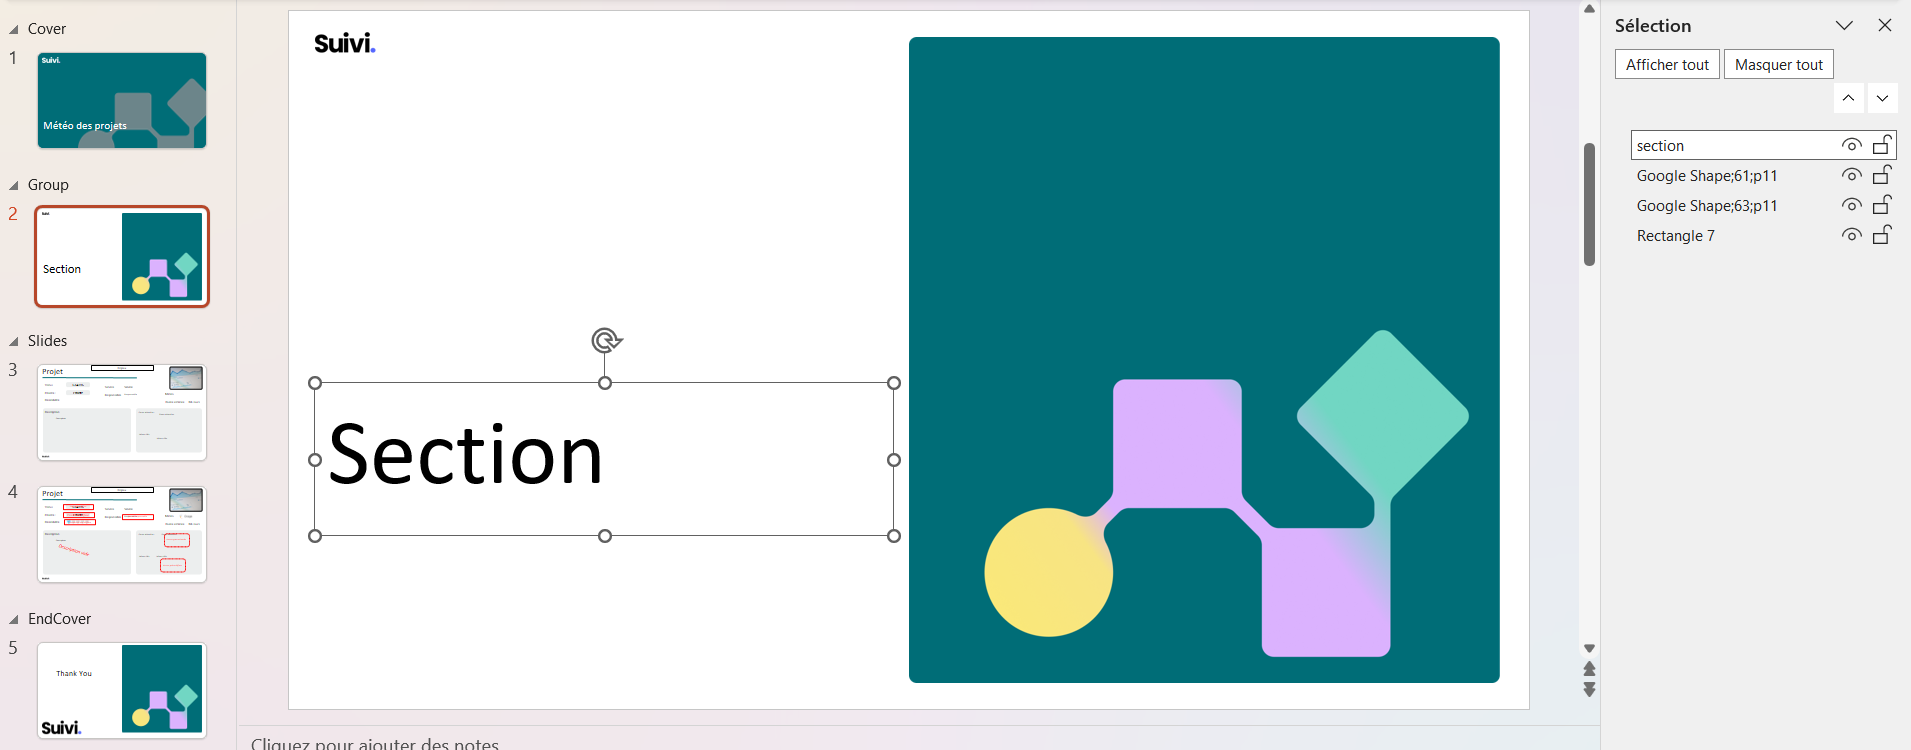
- Use the selection pane to see the names:
- Home menu → Select → Selection Pane
You now see each block with its attribute code (example: NomProjet, BudgetTotal, Statut)
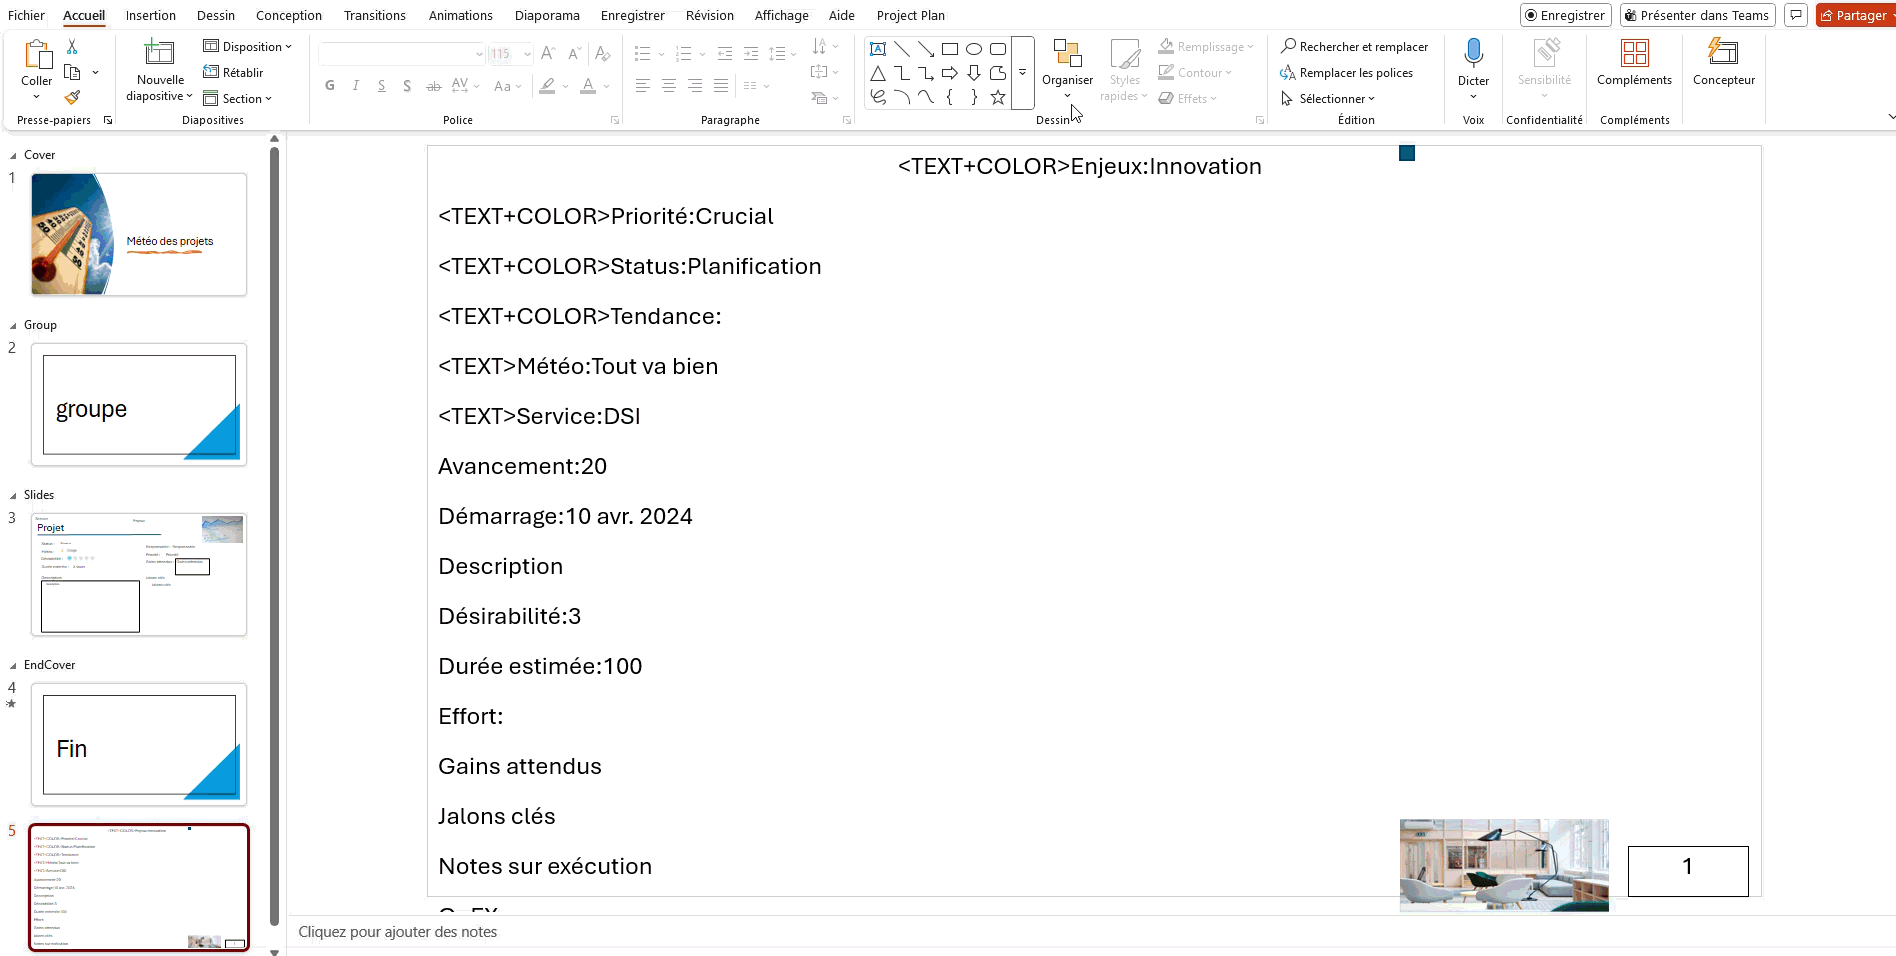
Configuration Process
For each block to display in your template:
- Identify the block in the example slide
- Copy its attribute code from the selection pane
- In the Slides section, click on the corresponding text block then paste the code
- Repeat for each attribute to display

Step 4: Test and Upload
Before Upload: Cleanup
- Delete the example slide if you copied it
- Make sure there is only one slide in the Slides section
- Save your file in PowerPoint format (
.pptx)

Uploading the Template
- In the Manage PowerPoint Templates dialog of your board:
- Click on the Template File area
- Select your
.pptxfile
- Click on Upload
- Restrict access (optional):
- Choose a specific role or Everyone
- Check "Active" if the template is ready, otherwise it will be reserved for admins
- Click on Close
Test the generation
- Click on the PPTX button in the toolbar
- Select your template
- Suivi generates the file (a few seconds)
- Download and open the generated file

Common errors
Codes not replaced?
- Check the exact spelling of the codes in your template
- Check the case
Incorrect layout?
- Blocks overlapping? Readjust in your template
- Text cut off? Increase the size of the blocks
With each iteration:
- Modify your PowerPoint file
- Re-upload (replaces the old one)
- Regenerate a test
- Refine until satisfied