🎯 Objective
This feature allows you to directly connect deliverable-type attributes from the Suivi platform to your enterprise SharePoint storage space. By eliminating document duplication and intermediate manual downloads, this integration ensures that your files are deposited securely and centrally in your single source of truth. End users can thus make their deposits directly from their business workflow in Suivi, while respecting the governance, lifecycle, and compliance of your Microsoft 365 infrastructure.
⚙️ Prerequisites
- Have a user account on Suivi with Contributor rights.
- Confirm that the global SharePoint connector has been activated on your Suivi instance.
- Make sure you have active Microsoft 365 credentials with write permissions on the target SharePoint site.
📝 Step-by-step instructions
Creating and activating the deliverable attribute
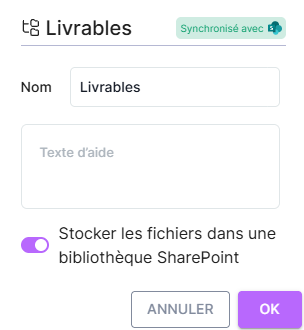
To create a deliverable attribute, navigate to a Suivi board and click the + button to create a new attribute, then select Deliverables.
- Fill in the Name field to identify the deliverable (for example, "Deliverables") and the Help text field to guide your collaborators when entering data.
- Toggle the Store files in a SharePoint library switch to switch from the default internal storage to your company's storage environment. The green Sync with SharePoint badge immediately appears in the panel header, indicating that the integration flow is ready to be configured.
- Click the OK button to save the initial attribute configuration.
Initializing the document structure on the item card
Once the attribute is enabled, open an activity card (for example, My item card).
- Locate the Deliverables section, identifiable by the SharePoint sync badge.
- If no folder is configured, click on the + New deliverable directory link located at the bottom of the section to create your first information collection directory.
- Click on the Configure tab to access the widget's local administration options.
Configuring the SharePoint Destination and File Restrictions
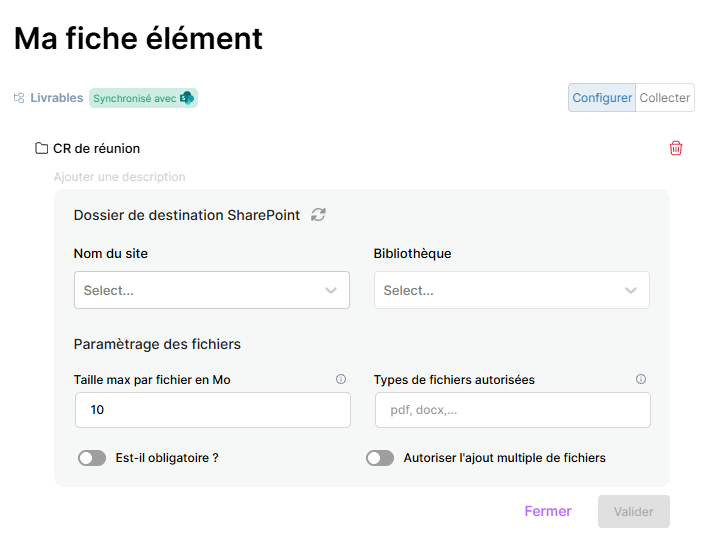
For each directory created (for example, Meeting Minutes), you must define its storage settings and upload constraints.
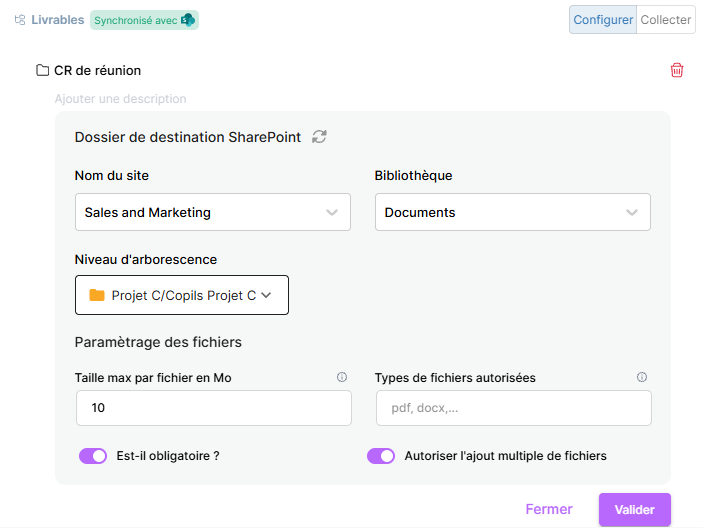
- In the SharePoint Destination Folder section, click the Site Name dropdown menu and select your company SharePoint site.
- Choose the destination library from the Library dropdown list.
- Select the exact location in the Root Directory dropdown menu. This selection restricts users' scope to validated folders, thus respecting your information architecture.
- In the File Settings section, enter the maximum allowed size in the Max File Size in MB field (for example, "10") and specify the accepted formats in the Allowed File Types field (for example, "pdf, docx") to standardize nomenclature and avoid format errors.
- Adjust the submission requirement via the Is it required? toggle and allow the submission of multiple supporting documents by enabling the Allow Multiple Additions toggle.
- Click the Save button to validate and lock these settings.
Document Submission and Collection by Users
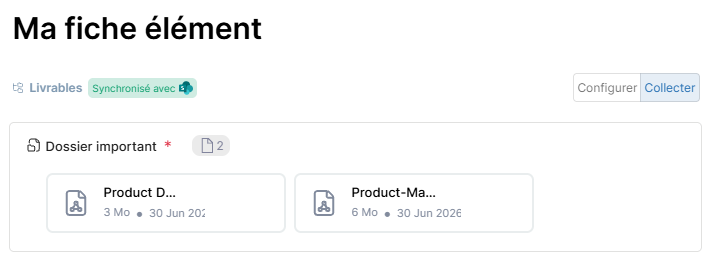
- To submit documents, click on the Collect tab to switch to the end-user deliverable submission interface.
- Click on the add area indicated by the + icon in the dashed rectangle, then select your local document.
- The file is directly transferred to the configured SharePoint location. Once the upload is validated, the count badge indicates the total number of documents successfully stored in this folder (for example, 2).
Comparative Analysis of Document Hosting Modes
Evaluating a company's hosting needs is typically based on security, volume, and legal compliance criteria. The comparison below illustrates the direct operational impact of transitioning from traditional internal storage to the reference SharePoint ecosystem:
| Evaluation Criteria | Internal Storage Mode (Suivi) | SharePoint Integration Mode (M365) |
|---|---|---|
| Physical Location | Hosted centrally and securely on Suivi SaaS platform servers | Stored within your organization's own Microsoft 365 tenant |
| Version Management | Simple sequential history upon manual replacement of deliverable | Complete and automatic version history with restoration capability |
| Retention Policies | Document lifecycle managed manually based on record deletions | Automatic application of legal retention and corporate archiving rules |
| Access Governance | Global access rights determined by Suivi user profiles | Granular access controls managed via Azure Active Directory and SharePoint groups |
| Search Capabilities | Text search limited to title and Suivi record properties | Global indexing of file content, enabling semantic and AI-powered search |
| Data Overload | High risk of duplicates from successive downloads and email sharing | Single source of truth with dynamic link sharing to avoid saturation |
❓ Troubleshooting Common Issues or Advanced Use Cases
We will now detail the most common connection and access errors to help you quickly unblock your workflows.
The Global SharePoint Connector Is Not Enabled
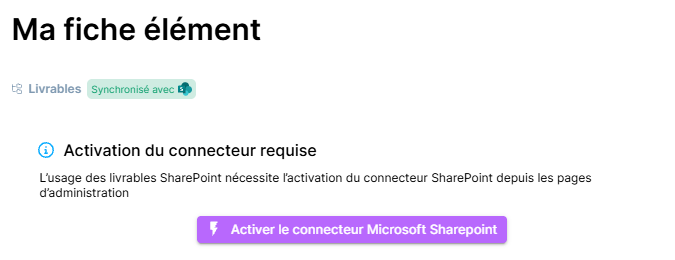
If the enterprise SharePoint connector has not been initialized at the Suivi general settings level, the widget will display a warning message and block configuration.
- If you are a platform administrator: The Connector activation required alert is displayed. Click the Activate SharePoint connector button to be redirected to the administration panel and link the application to your Microsoft 365 tenant.
- If you are a user or configurator: The interface prompts you to notify your IT department. Click the Send connector activation request button to automatically send a notification email to your system administrator.

Microsoft authentication expired or required
In order to browse SharePoint directories, each user must validate their identity with Microsoft Office 365.
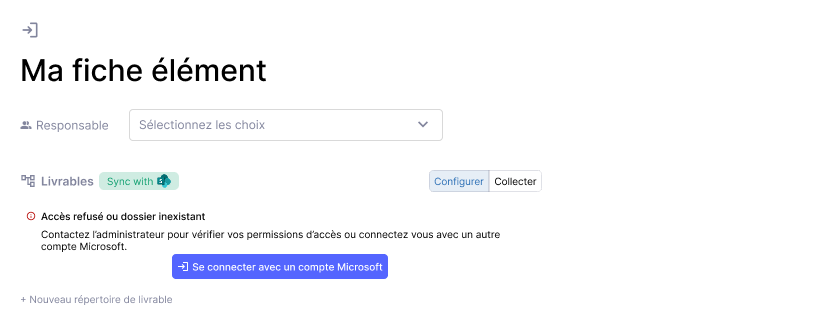
Access Denied or Destination Folder Does Not Exist
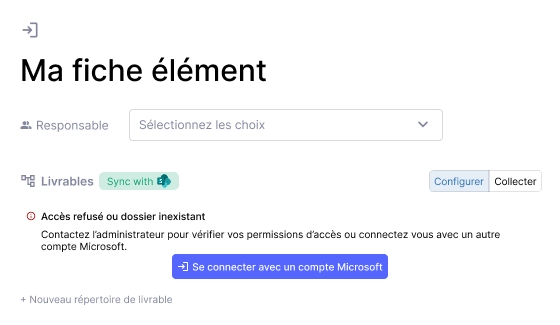
If the red Access denied or folder does not exist alert appears when attempting to configure or view, this is due to two main causes:
- Insufficient permissions: Your Microsoft account does not have the required write or read permissions on the designated SharePoint library. Click the Sign in with a Microsoft account button to attempt authentication with another account that has appropriate access rights, or contact your SharePoint site administrator to update your permissions.
- Modified structure: The original SharePoint folder has been renamed or deleted directly from SharePoint. The configurator must then return to the Configure tab of the form to reassociate an existing and valid root directory.