How to Configure Automatic Synchronization (SCIM) with Microsoft Entra ID
Estimated reading time: 6 minutes
🎯 Objective
This article guides you through configuring automatic provisioning (SCIM 2.0) between your Microsoft Entra ID enterprise directory (formerly Azure AD) and the Suivi platform. With this integration, centralize your access governance: user or group creations, modifications, and deactivations performed in Entra ID are reflected in real-time on Suivi, eliminating tedious manual management and reducing security error risks.
⚙️ Prerequisites
- Have a Suivi subscription on the ENTERPRISE plan.
- Have Administrator rights on your Suivi organization.
- Have Application Administrator or Global Administrator rights on your Microsoft Entra ID tenant.
📝 Step-by-Step Instructions
Step 1: Enable Synchronization and Choose the Identity Provider in Suivi
- Log in to your Suivi administration area.
- In the left menu, click on the User Synchronization section.
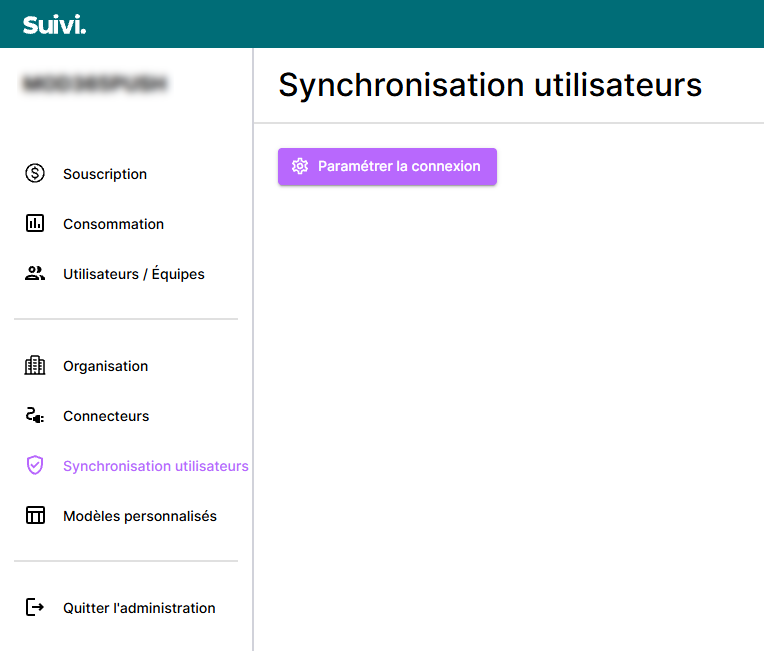
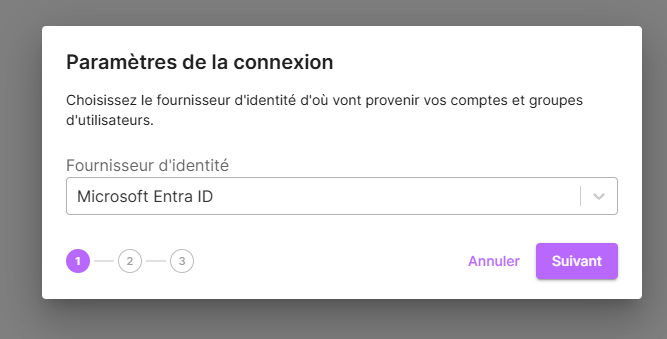
- In the dialog box that appears, select Microsoft Entra ID from the Identity Provider dropdown menu.
- Click the Next button.
Step 2: Retrieve SCIM Connection Information
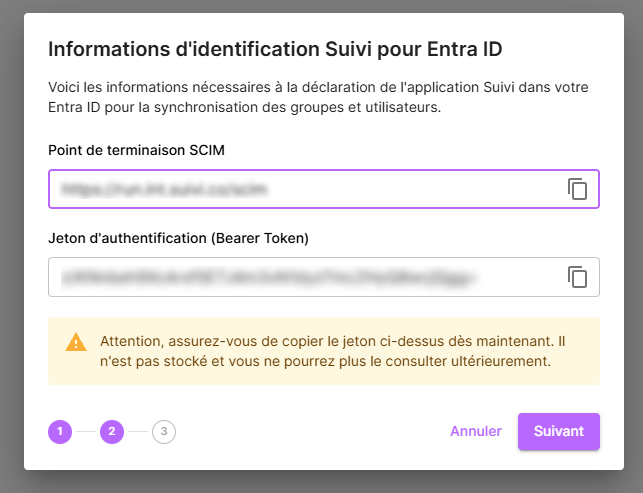
- The window now displays your unique credentials required for Entra ID.
- Copy the SCIM Endpoint (Tenant URL) by clicking the copy icon to the right of the field.
- Copy the Authentication Token (Bearer Token) in the same way.
Warning: Make sure to save and copy this token now in a secure location. It will no longer be displayed afterwards and you will not be able to view it later. You can generate a new token from the administration interface.
- Click the Next button.
Step 3: Configure attribute mapping and synchronization options
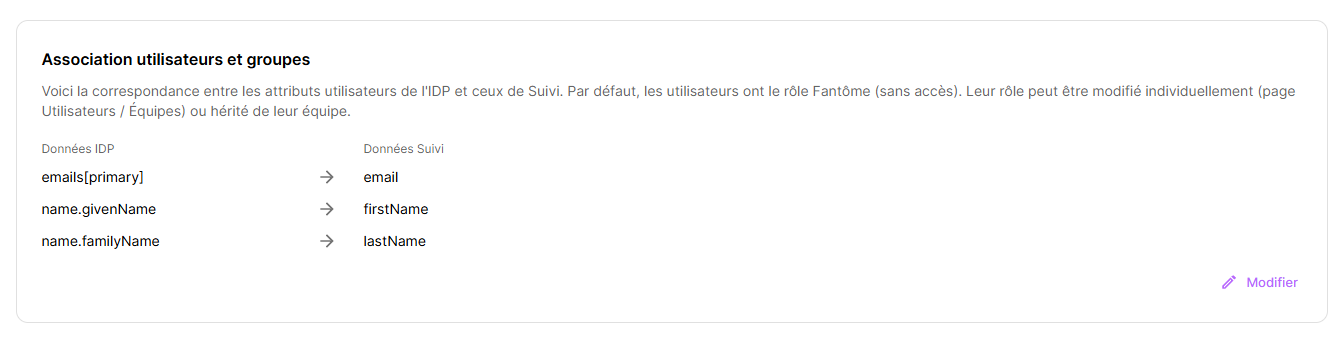
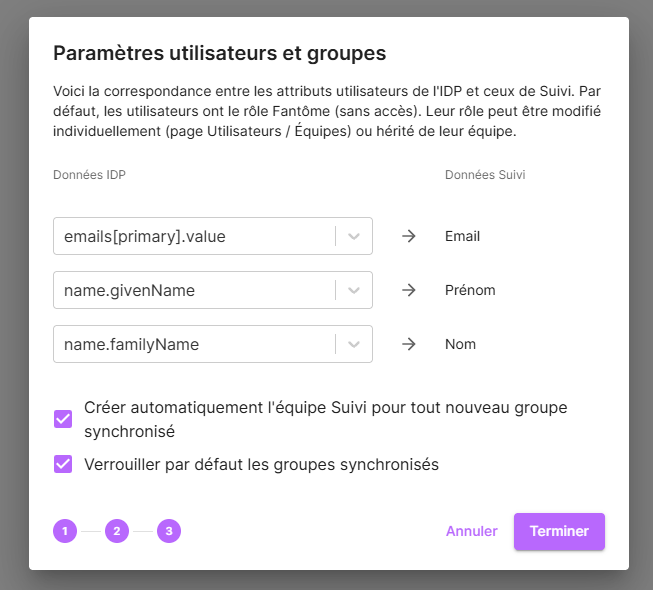
- In the third step of the configuration, verify the default attribute mapping from your identity provider to Suivi:
emails[primary].value➔ Email
name.givenName➔ First Name
name.familyName➔ Last Name
- Check the synchronization options according to your governance preferences:
- Automatically create the Suivi team for any new synchronized group: if enabled, each imported Entra ID group will create a mirror team in Suivi.
- Lock synchronized groups by default: if enabled, locks the configuration of Suivi teams (adding/removing members and deleting the team). Only changes in Entra ID are allowed.
You can modify these settings later in the user synchronization configuration page.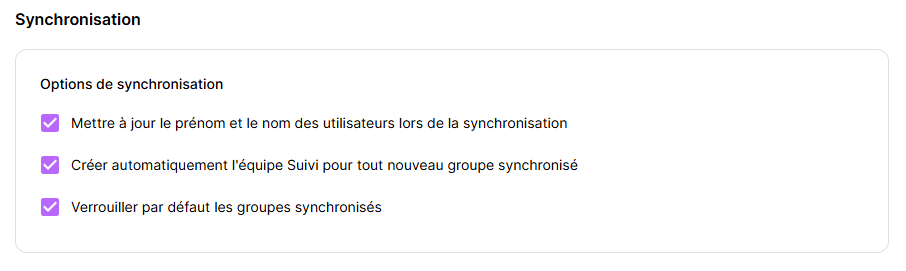
- Click Finish.
Step 4: Enable Provisioning in Microsoft Entra ID
- Go to your Microsoft Entra ID portal.
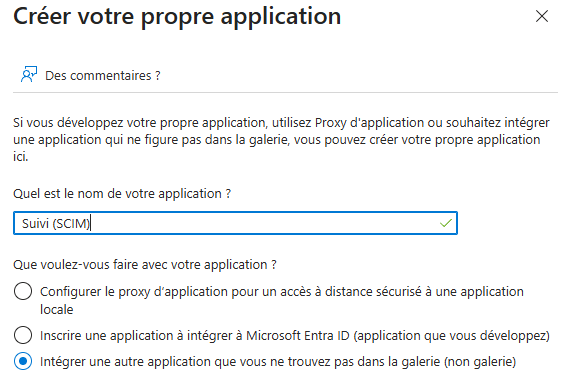
- Add the Suivi (SCIM) application from the Entra application gallery.
- Go to the application's Provisioning settings.
- Click on new configuration.
- Paste the information retrieved in Step 2:
- Tenant URL: the URL of your SCIM endpoint provided by Suivi.
- Secret Token: your Bearer Token provided by Suivi.
- Click Test Connection to validate communication (a 200/OK response should be returned).
- Set the application scope to synchronize only assigned users and groups, then start provisioning.
To understand how SCIM provisioning works in Entra ID, refer to the Microsoft documentation.
Step 5: Map Entra ID groups with Suivi teams
Once the connection is established between Entra ID and Suivi, you need to configure the mapping of your groups to dynamically control permissions and visibility in Suivi.
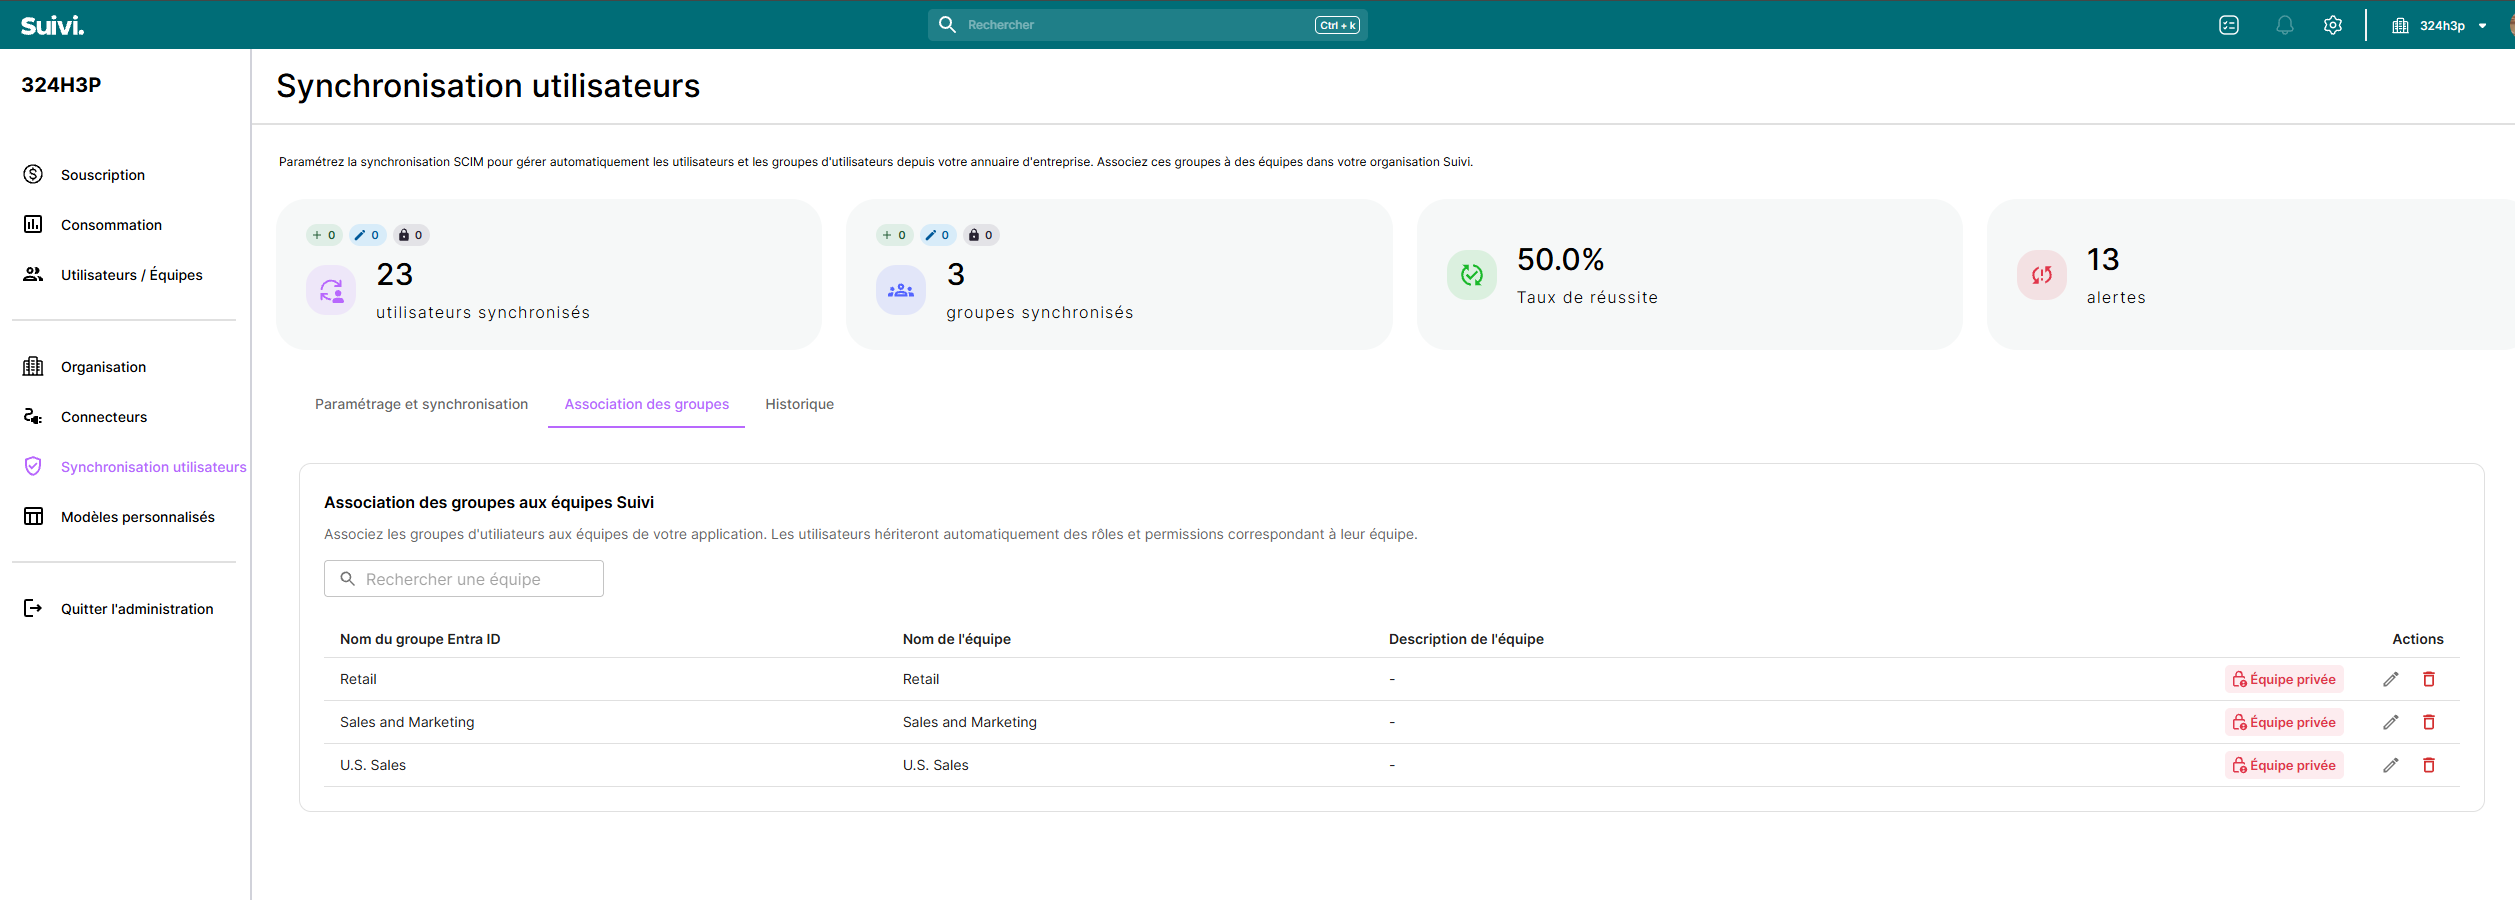
- In Suivi, return to the User synchronization menu and click on the Group mapping tab.
- The list of groups imported from Entra ID is displayed (e.g., Retail, Sales and Marketing, U.S. Sales).
- For each group, click on the dropdown menu under the Team Name column:
- Select an existing Suivi team to link this group to it.
- Or click on + Create a new team to automatically generate a structure with the same name.
- Optionally fill in a description for your team and click on the purple floppy disk icon on the right to Save.
Tip: An Entra ID group can only be mapped to a single Suivi team. However, a Suivi team can receive members from multiple Entra ID groups if your organization requires it.
Step 6: Monitor the synchronization status
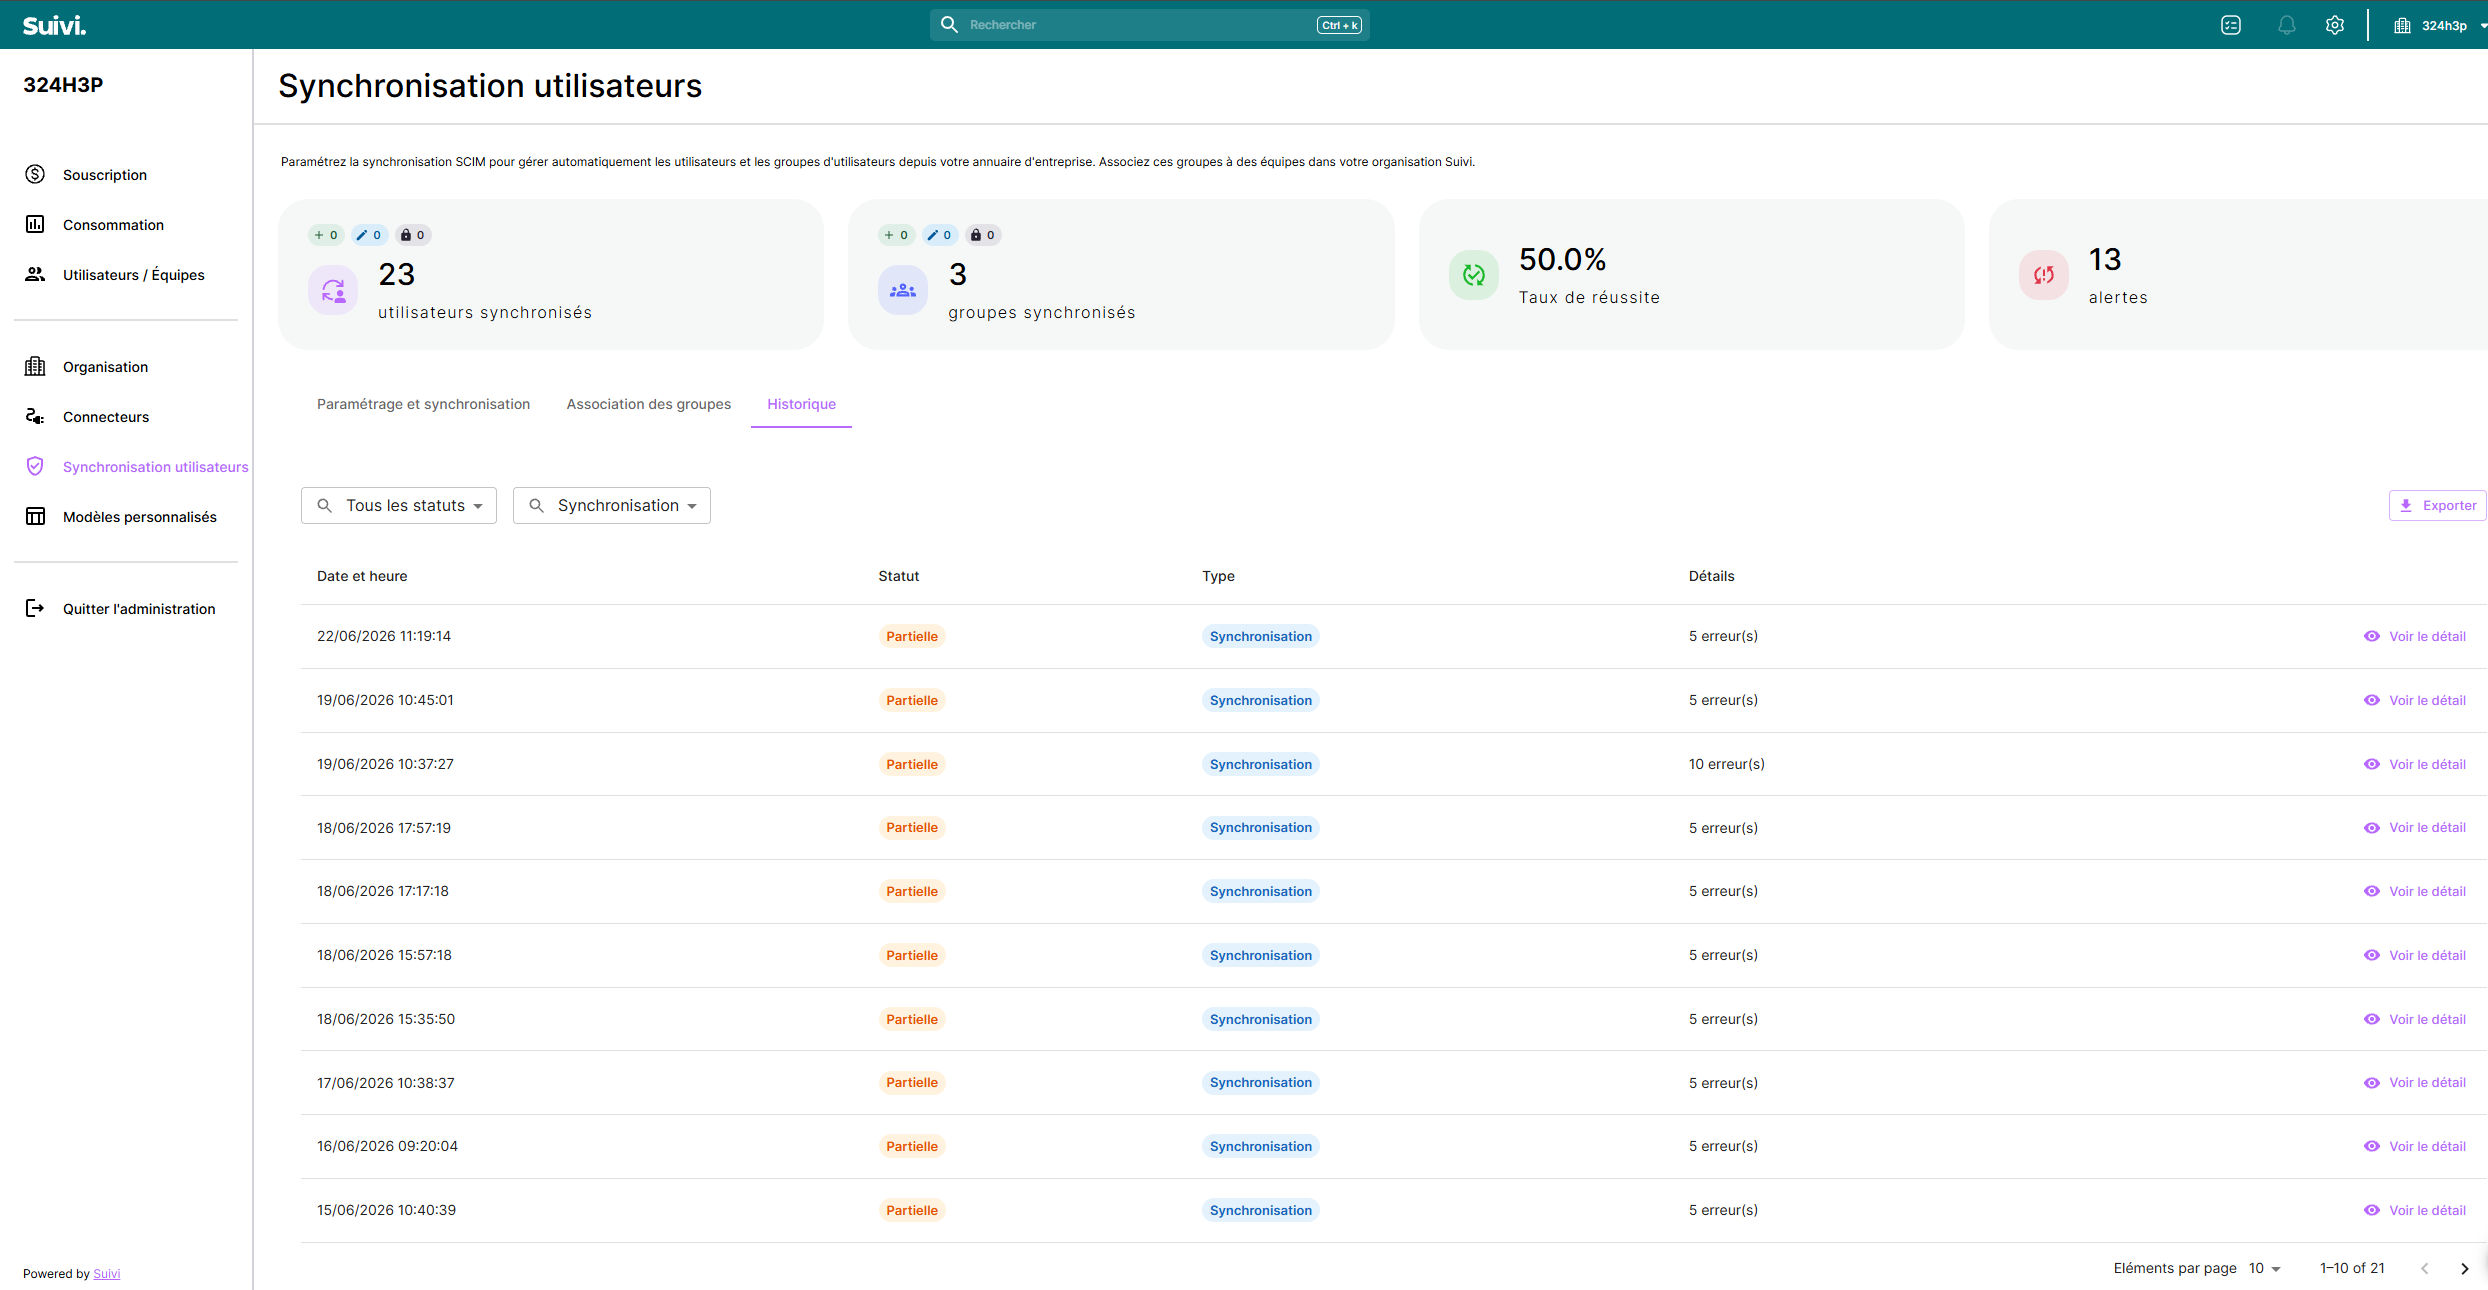
- To ensure that background imports are working properly, go to the History tab on the User Synchronization page.
- There you will find the dashboard displaying the overall Success Rate, the number of synchronized users, and the number of alerts.
- To analyze an event or anomaly, locate the relevant line and click on the View details link on the far right.
❓ Troubleshooting Common Issues (FAQ)
What does the "Partial" status with errors in my history mean?
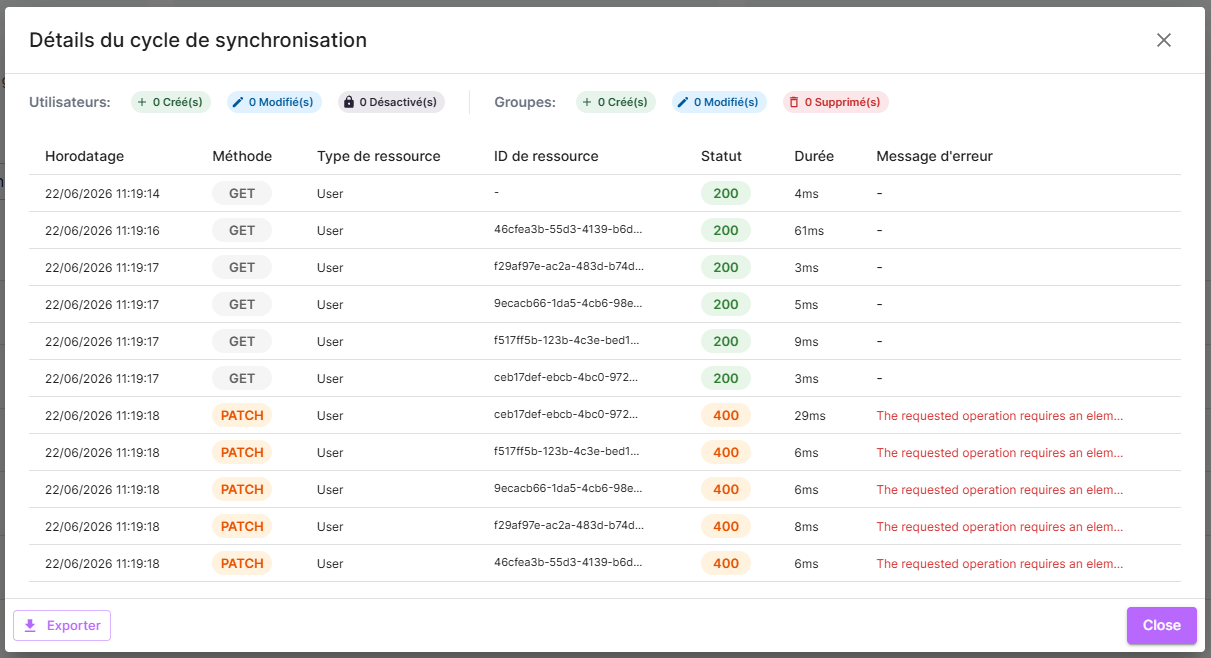
If a synchronization cycle displays errors (typically an HTTP 400 error code), click on View details. A popup window will list precisely the method (e.g., PATCH) and the error message returned by the API. Very often, the error "The requested operation requires an element..." indicates that a required attribute (such as the user's last name or email address) is missing or incorrectly formatted in your Microsoft Entra ID directory. Once corrected in Entra ID, the user will synchronize correctly in the next cycle.
What is the impact of deactivating a user in Entra ID?
When a user is deactivated or removed from the application in Microsoft Entra ID, their status automatically changes to Ghost in the Users tab of Suivi. The account is immediately suspended: the user loses access to the platform, but all their historical data, contributions, and presence on the organization's various boards remain preserved to ensure business continuity.
I lost my token or I want to renew my token, what should I do?
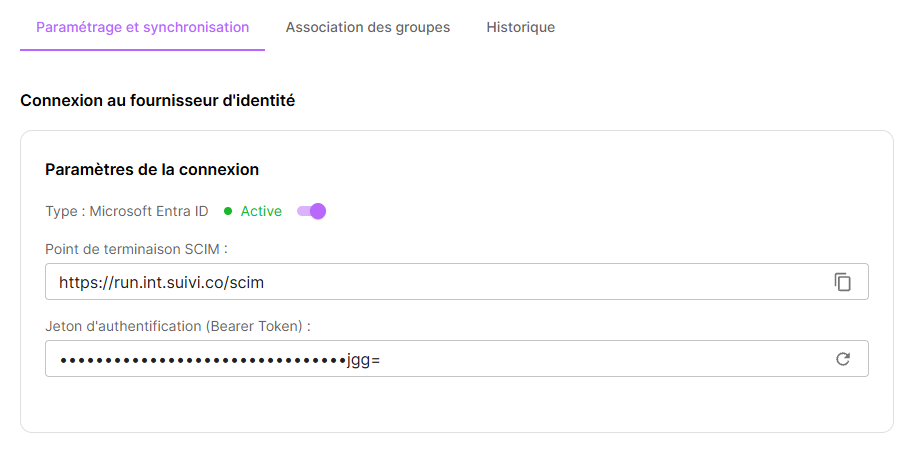
When you have lost your authentication token, or if you want to renew it, you can navigate to the Suivi administration interface in the User Synchronization section. In the Configuration and Synchronization section, click on the arrow to the right of the token to renew it.
Warning: Make sure to save and copy this token right now in a secure location. It will no longer be displayed afterwards and you will not be able to view it later. Renewing the token revokes the old token.
How do I modify the user attribute mapping?
To modify the user attribute mapping, you can navigate to the Suivi administration interface in the User Synchronization section. In the User and Group Association section, click on edit.